Using Affiliate Connect with Deem Car Fleet Management
- Becca Cook (Unlicensed)
- Malissa Olofernes (Unlicensed)
Note: See Video - Deem Affiliate Connect Using Deem Car Fleet Management for an overview.
Deem Car Fleet Management includes support for Deem Affiliate Connect. This topic summarizes the following activities you can perform from within Fleet Management:
Setting Up an Affiliate Provider
You need to set up an affiliate provider first, before farming out rides or accepting farmed-in rides. Follow these steps:
- If you don't already have categories such as AFFILIATE or AFFIL for designating drivers, follow these steps:
- Open the Driver Category table and create a new record (see Navigating Table Maintenance for details on opening tables and using action icons).
- Enter a category code for affiliates. See Setting Up Affiliates and Subcontractors for complete instructions.
- To add an affiliate, open the Affiliates/Subcontractors table and create a new record. Enter the affiliate's information under the General and Accounting / Dispatch tabs. See Setting Up Affiliates and Subcontractors for complete instructions.
Note: For a list of affiliates and member ID numbers, see the Deem Affiliate Connect Operators List.
Farming Out a Ride Reservation
To farm out a ride reservation, follow these steps:
- Create the reservation just like any other reservation, as described in Creating a New Reservation in Reservations or Creating a New Reservation in Dispatch.
- Find the reservation. See Viewing and Dispatching Rides in Reservations or Viewing and Dispatching Rides in Dispatch for instructions. The grid appears showing one or more reservations.
- Select the reservation in the grid and click the Dispatch Ride icon:

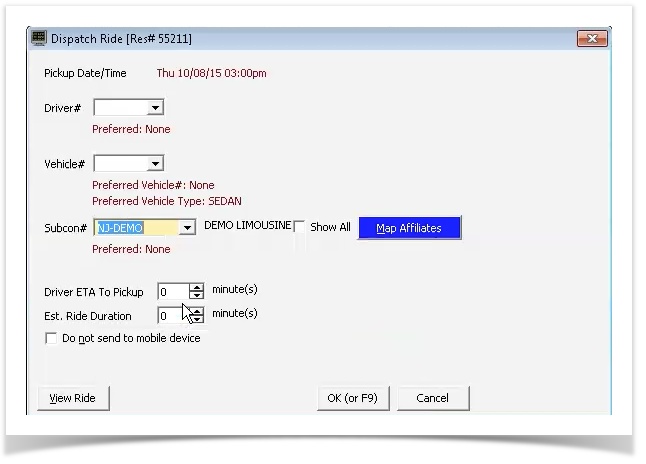
- Choose the affiliate from the Subcon# dropdown menu.
- Click the OK button.
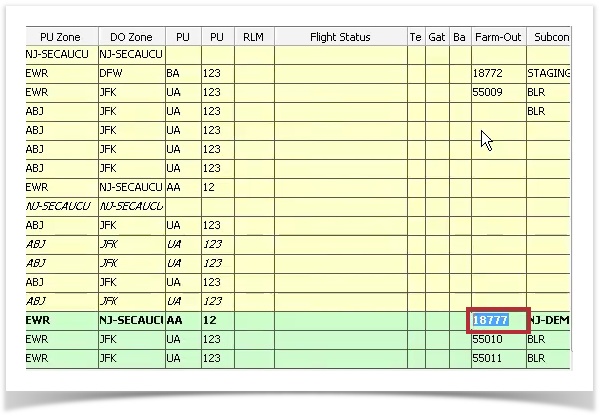
After dispatching a ride to an affiliate, the affiliate can accept the reservation, and you see the confirmation number appear for the reservation in the Farm-Out column of the grid:
Assigning a Farmed-In Ride Reservation
Using the Reservations module, you can choose Open Reservations from the File menu to show open reservations, including open farmed-in reservations. See Viewing and Dispatching Rides in Reservations for details on finding and selecting a reservation.
Using the Dispatch module, you can choose Farm-In Review from the File menu to show all farmed-in reservations to review, or choose Rides to Dispatch to show open reservations, including open farmed-in reservations. See Viewing and Dispatching Rides in Dispatch for details on finding and selecting a reservation.
To assign a car and driver, and dispatch the ride, follow these steps:
- Select the ride in the grid and click the Dispatch Ride icon:
- The Dispatch Ride dialog appears:
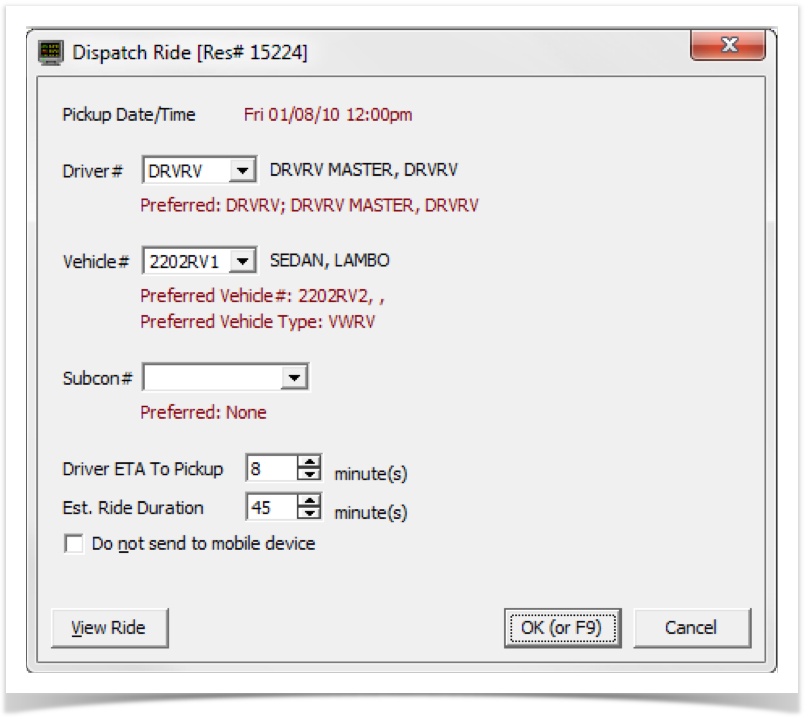
- Enter the Driver #, and the Vehicle #, but leave the Subcon# field blank.
- Click the OK button.
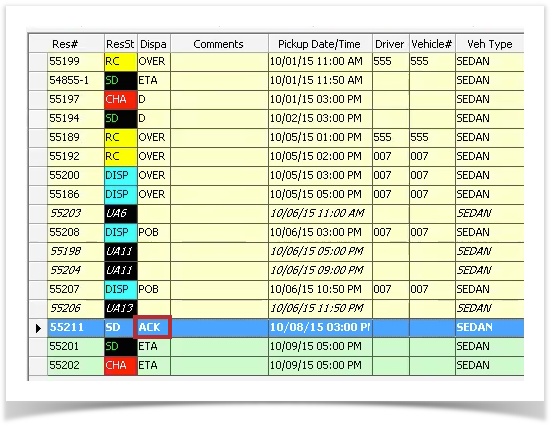
The ride status changes from AS to DISP. You can then send a status update to indicate that the driver acknowledged the reservation.
Note: For complete instructions on viewing and dispatching rides in the Reservations module, see Viewing and Dispatching Rides in Reservations For complete instructions on viewing and dispatching rides in the Dispatch module, see Viewing and Dispatching Rides in Dispatch.
Sending a Reservation Status Update
The driver should call in or send a message acknowledging the ride. You can update the dispatch status of a reservation before, during, and after the ride by following these steps:
- Select the ride in the grid and click the Dispatch Status icon:

- The Dispatch Status Change dialog appears. Choose one of the following in the Dispatch Status dropdown menu:
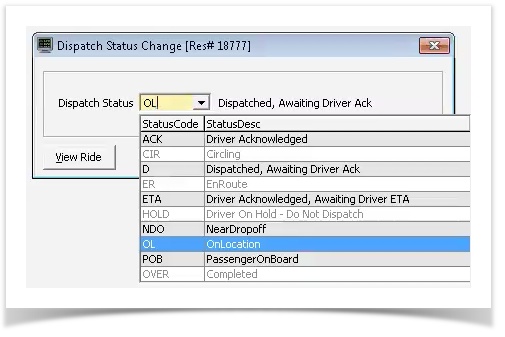
- ACK: Acknowledge that the driver is available.
Note: If you are acknowledging a farmed-in ride, setting the status to ACK sends a confirmation to the provider that farmed out the ride. - ETA: Awaiting the driver's estimated time of arrival.
- NDO: Driver is near the drop-off location.
- OL: Driver is on location.
- POB: The passenger is on-board.
- OVER: The ride is completed.
- ACK: Acknowledge that the driver is available.
- Click OK to set the status.
Note: For complete instructions on setting the dispatch status in the Reservations module, see Viewing and Dispatching Rides in Reservations. For complete instructions on on setting the dispatch status in the Dispatch module, see Viewing and Dispatching Rides in Dispatch .
Closing the Ride
When the ride is finished, the affiliate provider closes the farmed-in ride first, adding charges as needed. Then the sending provider that farmed out the ride can accept the charges and close the ride.
To close the ride as the affiliate provider, follow these steps:
- Start the Ride Closeout module, and choose Move Rides to Accounting from the File menu.
- The Move Rides to Accounting window appears. In the Up to Ride Date field, select the date for rides to be moved (should be the day prior to the current date).
- Leave the Set Closing Date checkbox blank.
- Click the Start button. When this is completed, the rides are marked as OPEN.
- Find the ride in the Ride Closeout module grid. For instructions, see Using the Ride Closeout Module.
- Select the ride in the grid, and click the Close Ride icon:

- The Close Ride checkbox should already be checked; if not, check the Close Ride checkbox. The By and On fields should be populated with the User ID and the system date respectively.
- Review the Pricing tab information and enter charges such as parking and tolls:
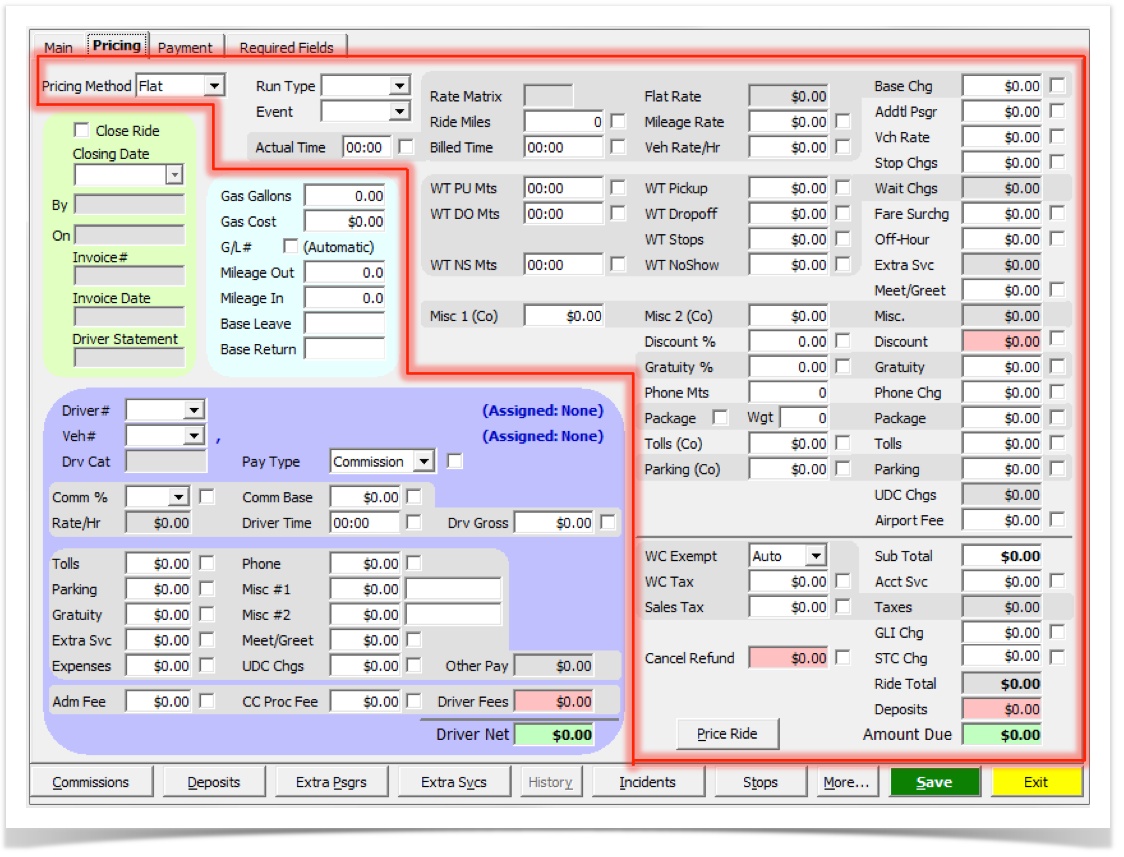
The Pricing tab shows the following (as outlined in the figure above):- All details of the pricing components billed to the customer (outlined in red).
- Accounting data compiled from the accounting actions take on the ride (section highlighted in green).
- Optional data you can enter if used in your operation (section highlighted in light blue).
- Driver Pay data, including charges such as parking and tolls (section highlighted in purple). See Using the Driver Pay Module for instructions on how to generate driver payments.
- Click Save to save any changes under the Pricing tab.
The farmed-in ride is now closed for the affiliate provider, and the charges are in place.
As the original booking provider that farmed out the ride, follow these steps above to close the ride and accept the affiliate's charges:
- Start the Ride Closeout module, and choose Move Rides to Accounting from the File menu.
- The Move Rides to Accounting window appears. In the Up to Ride Date field, select the date for rides to be moved (should be the day prior to the current date).
- Leave the Set Closing Date checkbox blank.
- Click the Start button. When this is completed, the rides are marked as OPEN.
- Find the ride in the Ride Closeout module grid. For instructions, see Using the Ride Closeout Module.
- Select the ride in the grid, and click the Close Ride icon:
- The Close Ride checkbox should already be checked; if not, check the Close Ride checkbox. The By and On fields should be populated with the User ID and the system date respectively.
- The Pricing tab includes charges entered by the affiliate, such as parking and tolls:
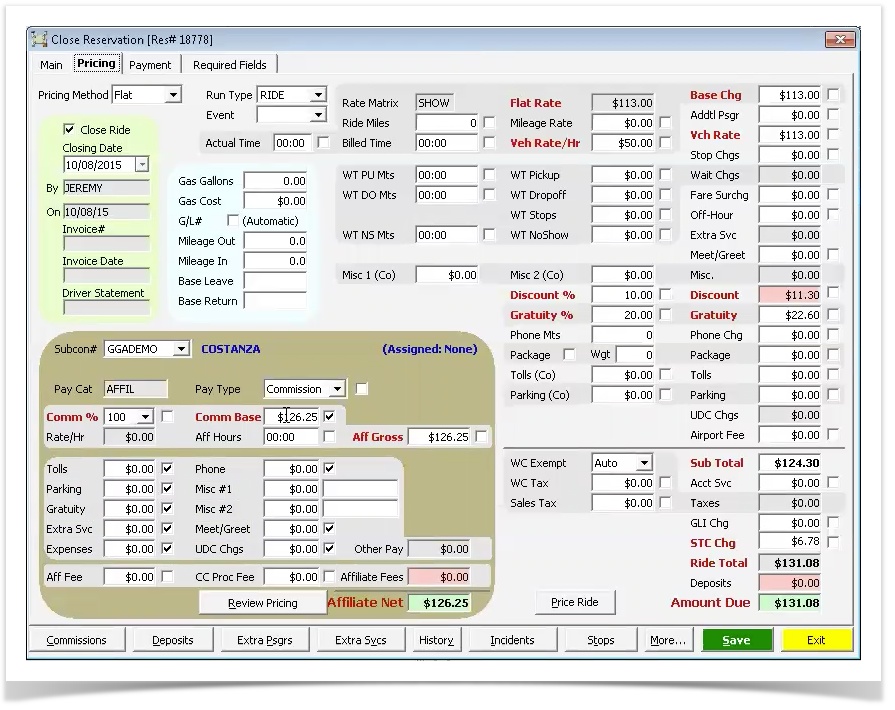
- Click the Review Pricing button to review the affiliate's pricing in detail:
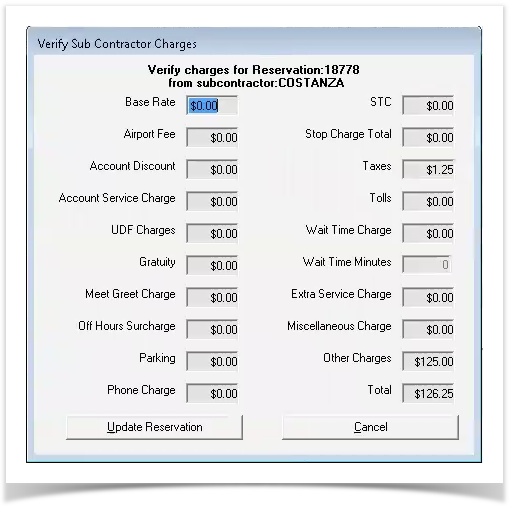
- Click Update Reservation to update the reservation with the affiliate charges and return to the Pricing tab.
- Click Save to save any changes under the Pricing tab.
Note: For complete instructions on closing rides, see Using the Ride Closeout Module.