Single Sign On
- Former user (Deleted)
- Kavita Pillai
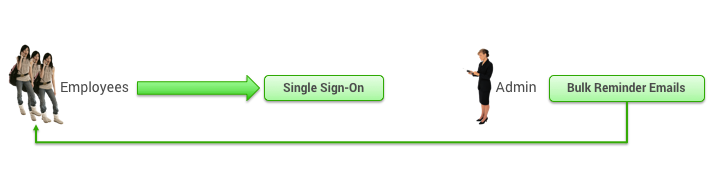
You can integrate your company's intranet so that users can access the site through the intranet without having to remember a separate username and password. Having logged into the intranet, users can automatically be provisioned and authenticated. You can also send bulk reminder emails to remind employees to use the single sign-on link (see Bulk User Activations and Reminders for instructions).
Note: With single sign-on (SSO), your company hosts the entry point into the site. Your company's IT department may need to assist. See Implementing Single Sign-On (SSO) for Desktop for a technical overview and sample assertion and provisioning code.
Configuring SSO Settings
After clicking the Settings tab, click Single Sign On. The Settings | Single Sign On page appears.
Click one of the following options:
- Enable Username/Password based login: Click this checkbox to enable a username and password login. Clicking this checkbox enables this login method for the entire site (domain).
- Enable Single Sign On: Click this checkbox to enable single sign-on. Clicking this checkbox enables this single sign-on for the entire site (domain).
- Enable BOTH Username/Password based login and Single Sign on: Click this checkbox to enable both. Clicking this checkbox enables both methods for the entire site (domain).
Company SSO End Point: Enter the end point, such as a URL, at which the user should arrive after clicking a link to log into the site.
Enable Attribute Propogation in SSO End Point URL: Click this checkbox to enable attribute propagation in your company's end point.
Suppress Profile Synchronization for Provisioning: Click this checkbox to suppress profile synchronization while provisioning through SSO.
Authentication Token Configuration
Make choices in the Token section:
Identification Attribute: Choose UserName, Email, or ExternalID from the dropdown menu.
Token Type: This field lets you identify the type of token, the format of the message, and how the message comes through. Choose one of the following from the dropdown menu:
- XML SSO Token HTTP URL Parameter
- Pipe Separated SSO Token HTTP URL Parameter (username|expirationDate in GMT)
- Simple SSO Token HTTP URL Parameter - This is mostly used for testing. It is recommended that you not select this in a production environment.
- SAML SSO token HTTP URL parameter
Token Name: Enter the name of the token. This would be the name value pair. The token name will appear in the URL parameter.
Make choices In the Token Encryption Configuration section:
Algorithm: Choose the algorithm used to encrypt the token.The options are all standard encryption algorithms:
- RSA: This is the most secure encryption. You need to have a private key and a public key.
- DES: This is the least secure encryption. This option does not require private and public keys.
- DESede: This is more secure than DES. This option does not require private and public keys.
- ClearText (no encryption): No encryption used.
Certificate: Specify the certificate that contains the public key that will be used by Deem to encrypt the token.
Encryption Algorithm Parameters: Enter the required name value pairs (one per line). Separate each value by pressing Enter.
Authentication Token Validation Failure
A token validation error message usually occurs if the site does not recognize the user. Click the checkbox for one of the following:
- Display Message: Enter the text or HTML that appears to the user when the user can't be validated.
- Redirect URL: Enter the URL that the user will be automatically redirected to when the user can't be validated.
Access Without Authentication Token
Click the checkbox for one of the following:
- Display Message: Enter the text or HTML that appears to the user after trying to access the site without an authentication token.
- Redirect to specified URL: Enter the URL that the user will be automatically redirected to after trying to access the site without an authentication token.
Session Timeout
Click the checkbox for one of the following:
- Display Message: Enter the text or HTML that appears to the user when the session times out.
- Redirect to specified URL: Enter the URL that the user will be automatically redirected to when the session times out.
Sign Out
Click the checkbox for one of the following:
- Display Message: Enter the text or HTML that appears to the user when the user logs out.
- Redirect to specified URL: Enter the URL that the user will be automatically redirected to when the user logs out.\
Provisioning Failure
Click the checkbox for one of the following:
- Display Message: Enter the text or HTML that appears to the user if a provisioning failure occurs.
- Redirect to specified URL: Enter the URL that the user will be automatically redirected to if a provisioning failure occurs.
Partner Provisioning Failure
Click the checkbox for one of the following:
- Display Message: Enter the text or HTML that appears to the user if a provisioning failure occurs in a remote partner call.
- Redirect to specified URL: Enter the URL that the user will be automatically redirected to if a provisioning failure occurs in a remote partner call.
Redirect URL
You can optionally set up a redirect URL so that during single sign on authentication, the user is redirected to this URL with a callback URL. The callback URL will resume the single sign on process and should be specified in the URL with the replacement token *CALLBACK_URL*.
Saving Your Configuration
Click Save at the bottom of the page to save your settings.
Note: To commit all of your changes after saving them, click the changes not applied link at the top of the page. The Commit Changes page appears. Click the Commit button.