Using Deem Car Service - Apollo Scripts
To use the Apollo global distribution system (GDS) to add car service reservations, you can automate the process by invoking a script provided by Deem. By pre-populating the name, billing, and address fields from the passenger name record (PNR), Deem Car Service ensures consistency throughout the booking process.
Installing and Running the Script (Windows Only)
You can install the Deem Car Service script for the Apollo GDS by clicking the link in the email provided by Deem. You must have administrator rights to your computer to install the script.
When downloading the script, click Open or Run – don't click Save. Wait for the script to download, and then click Next. Follow the instructions to complete the download.
To create access to the script, follow these steps:
- Run Windows Explorer and select the C drive.
- Open Deem Car Service.
- Right-click the "Deem Car Service.exe" file for the dropdown menu, and click Create Shortcut.
- Drag the shortcut to your Windows task bar for quick launch.
- Alternatively – you can create a pkey or quick command that points to C:\Saturn\saturn.exe
Note: While the script is open, you must work with one record at a time. Otherwise, the information pulled into the script will be out of sync with the current record.
From the main window you can choose the following:
- One Way Reservation: Click to create a one-way car service reservation.
- Round Trip Reservation: Click to create a round-trip car service reservation.
- Hourly/Wait and Return: Click to create a reservation for wait and return service, charged at an hourly rate.
- Modify Reservation: Click to modify an existing reservation.
- Cancel Reservation: Click to cancel an existing reservation.
Agent Name Setup
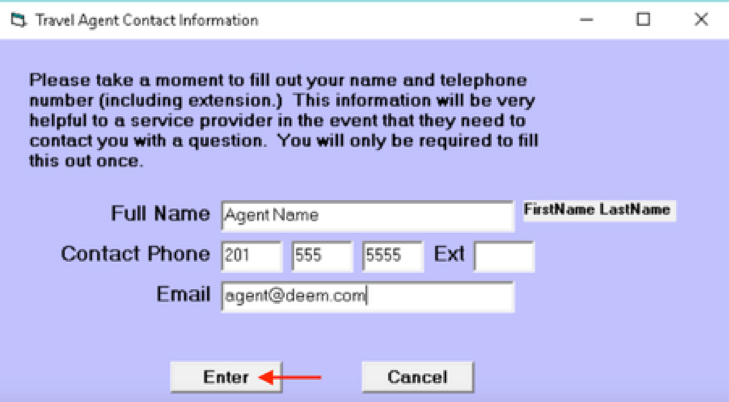
The first time you run the Deem Car Service script, you need to enter the agent name, phone number, and email address:
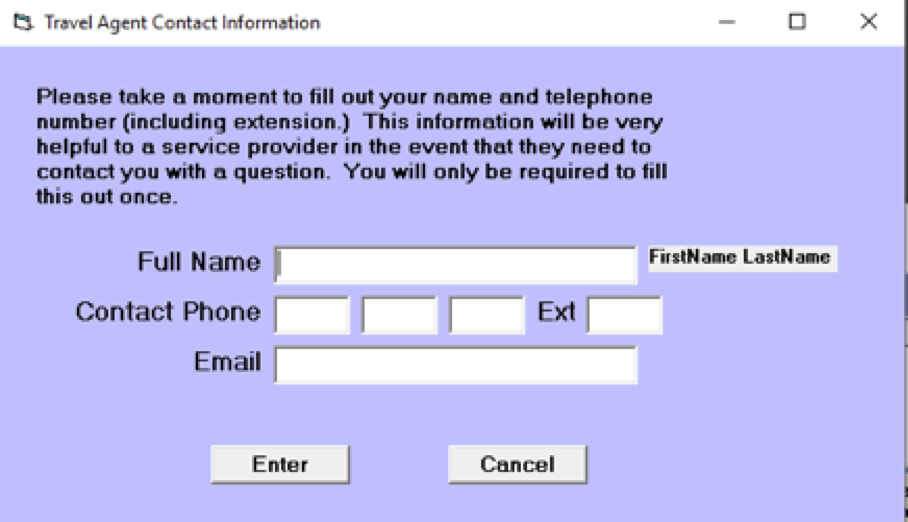
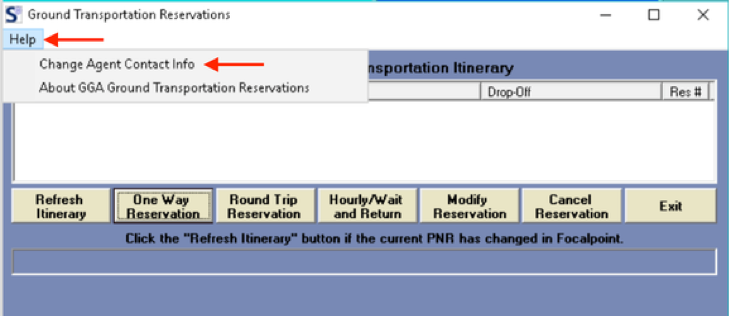
Tip: This information can be viewed and changed by clicking Help in the upper left corner of the main window.
Booking a Reservation
Click One Way Reservation or Round Trip Reservation in the main window to create a car service reservation. (To book an Hourly/Wait and Return reservation, see "Booking an Hourly Wait and Return Reservation").
The New Reservation window appears. The script automatically reads all flight and hotel segments from the PNR, and pre-populates home and office address, telephone, credit card, and email information from the passenger’s profile. 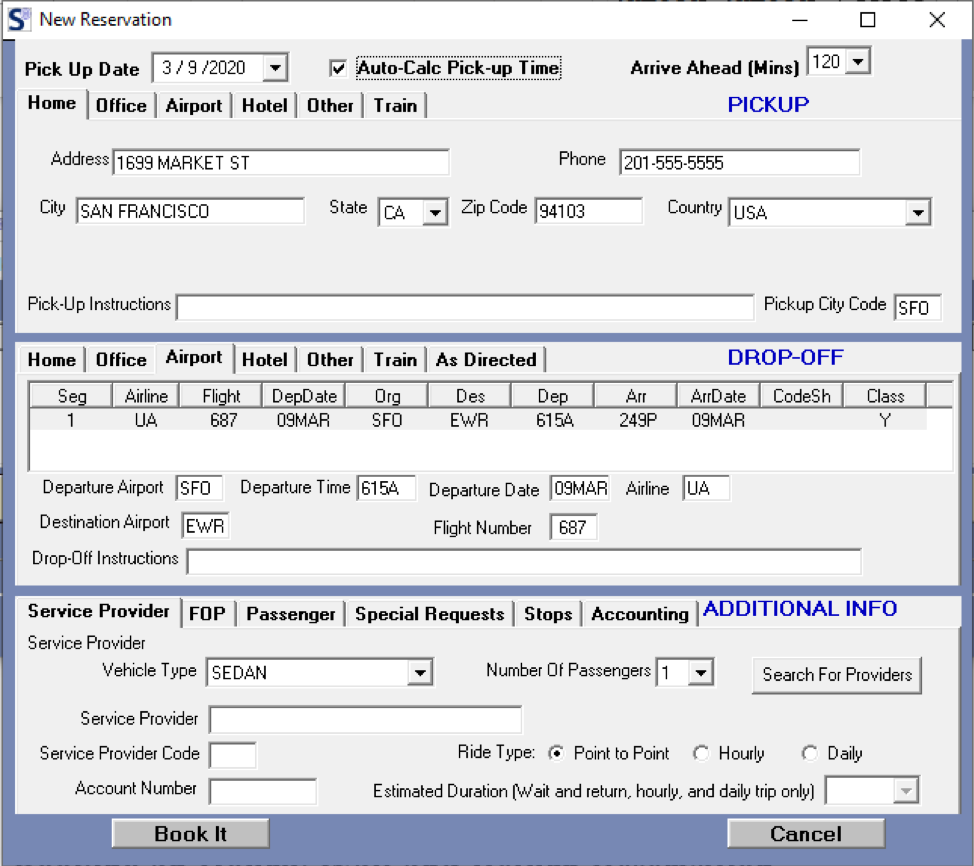
Booking an Hourly Wait and Return Reservation
Click the Hourly/Wait and Return button in the main window to create an Hourly/Wait and Return car service reservation. The Select Wait and Return Hours window appears. Select the estimated amount of time that the passenger requires use of the car in the Hours dropdown menu: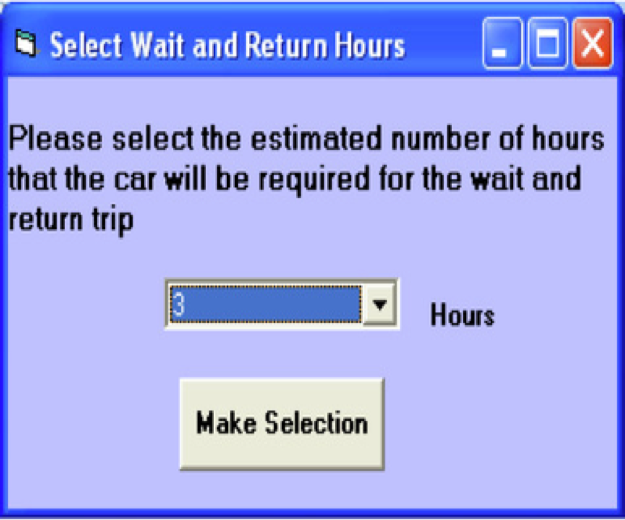
Tip: This information will pre-populate fields under the Service Provider tab.
Calculating or Setting the Pickup Time
Deem Car Service can automatically return a pickup time on confirmation if you click the checkbox for Auto-Calculate Pickup Time, and choose the number of minutes for the Arrive Ahead dropdown menu: 
The Arrive Ahead dropdown menu is the number of minutes the passenger would like to arrive at an airport before a flight or a train station before a train. If you specify minutes for Arrive Ahead, the system automatically calculates and assigns a pickup time on confirmation. The Arrive Ahead dropdown menu appears only for drop-off locations specified under the Airport or Train tab.
When using Arrive Ahead, do not change the pickup date assigned as you choose the flight or train segment.
Overnight Pickup
If you have a passenger flying at 1:00 AM on November 12th, but the car service needs to pick up the passenger at 11:00 PM on November 11th, do not alter the pickup date and time to November 11th. Enter the number of minutes prior to the flight the passenger needs to be at the airport in the Arrive Ahead field (for example, 90 minutes before the flight). This will book the car service for the appropriate time and day prior to the flight (11NOV).
To set the pickup time without automatic calculation, click to remove the checkmark from the Auto-Calculate Pickup Time option. The Pick-Up Time option appears for specifying a pickup time. Click the up and down arrows to select a time.
Note: Verify that the Auto-Calculate Pickup Time and Arrive Ahead dropdown menu is selected, or that the Pick-Up Time selection is made, before booking the reservation.
Setting the Pickup Location
When choosing a predefined location, the address information is pre-populated from the PNR itinerary or passenger profile for easy booking.
Click one of the following tabs:
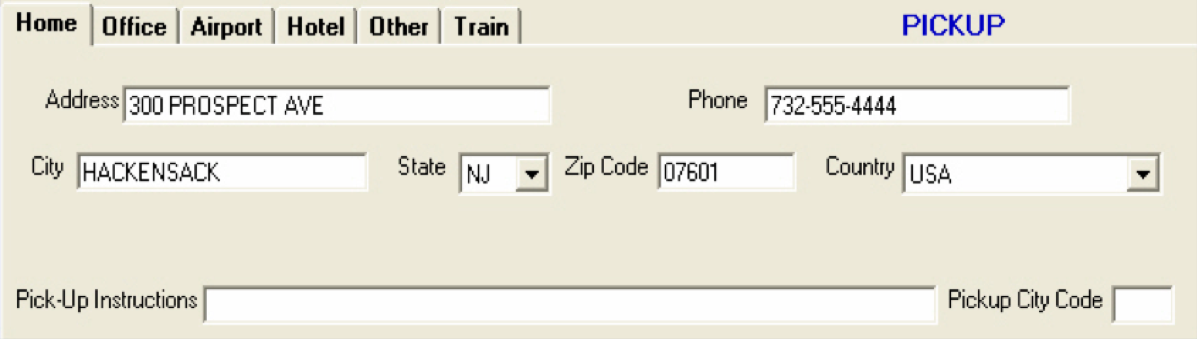
- Home: Click this tab to use the passenger's home address for the PICKUP section. You can change the address information if necessary, and add pickup instructions in the Pick-Up Instructions field at the bottom of the PICKUP section. If it is not already pre-populated, add the three-letter city code (for example, NYC for New York City) in the Pickup City Code field.
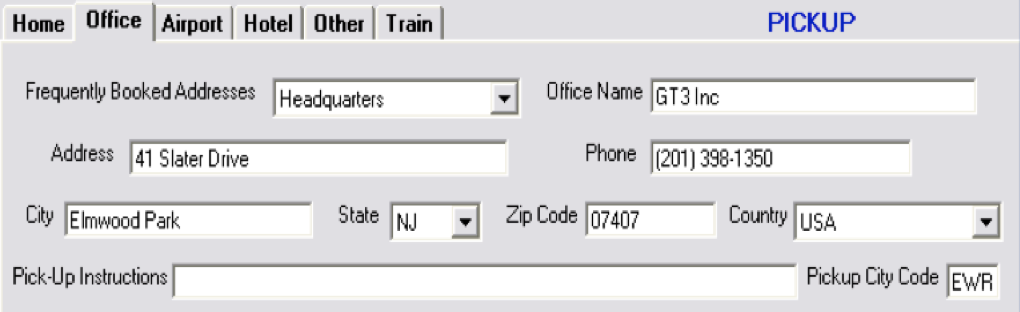
- Office: Click this tab to use the passenger's office address for the PICKUP section. You can change the address information if necessary, and add pickup instructions in the Pick-Up Instructions field at the bottom of the PICKUP section. If it is not already pre-populated, add the three-letter city code (for example, NYC for New York City) in the Pickup City Code field.
- Airport: Click this tab to specify an arriving flight at an airport for the PICKUP section. Each flight segment in the PNR appears as a separate row. Click the row to select the flight segment. The departure and destination airport codes, arrival time and date, airline, and flight number are pre-populated. You can add pickup instructions in the Pick-Up Instructions field at the bottom of the PICKUP section.
- For Meet and Greet Service, enter MEET AND GREET as the first 3 words in the Pick-Up Instructions field. The client will be met inside baggage claim with a sign and charged an additional fee.
- Hotel: Click this tab to specify a hotel for the PICKUP section. Each hotel segment in the PNR appears as a separate row. Click the row to select the hotel. The hotel address is pre-populated. You can add pickup instructions in the Pick-Up Instructions field at the bottom of the PICKUP section.
- Train: Click this tab to specify an arriving train at a train station for the PICKUP section. Each train segment in the PNR appears as a separate row. Click the row to select the train segment. The departure and destination station codes and arrival time and date are pre-populated. You can add pickup instructions in the Pick-Up Instructions field at the bottom of the PICKUP section.
- Other: Click this tab to enter a pickup address manually. Add the three-letter city code (for example, NYC for New York City) in the Pickup City Code field.
Note: If you are not choosing Hotel, Airport, or Train, please remember to add a three letter city code (for example, NYC for New York City) in the Pickup City Code field.
Setting the Drop-off Location
When choosing a predefined location, the address information is pre-populated from the PNR itinerary or passenger profile for easy booking.
Click one of the following tabs:
- Home: Click this tab to use the passenger's home address for the DROP-OFF section. You can change the address information if necessary, and add drop-off instructions in the Drop-Off Instructions field at the bottom of the DROP-OFF section.
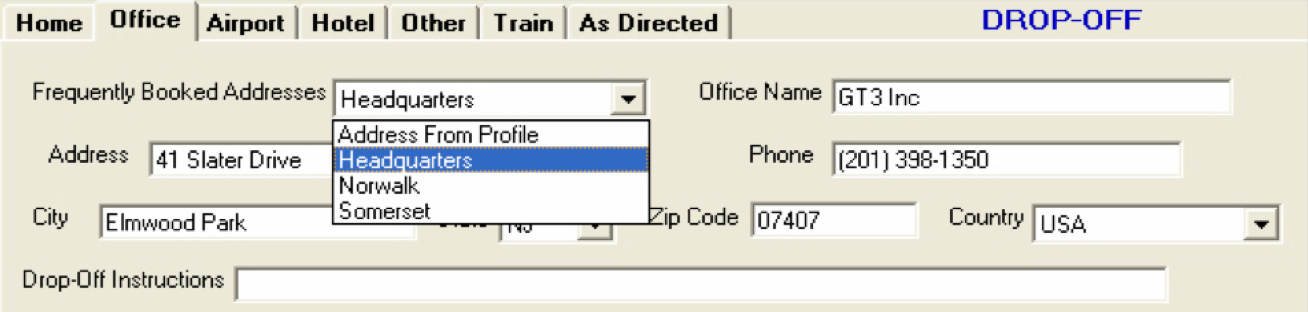
- Office: Click this tab to use the passenger's office address for the DROP-OFF section. You can change the address information if necessary, and add drop-off instructions in the Drop-Off Instructions field at the bottom of the DROP-OFF section.
- Airport: Click this tab to specify a departing flight at an airport for the DROP-OFF section. Each flight segment in the PNR appears as a separate row. Click the row to select the flight segment. The departure and destination airport codes, departure time and date, airline, and flight number are pre-populated. You can add drop-off instructions in the Drop-Off Instructions field at the bottom of the DROP-OFF section.

- Hotel: Click this tab to specify a hotel for the DROP-OFF section. Each hotel segment in the PNR appears as a separate row. Click the row to select the hotel. The hotel address is pre-populated. You can add drop-off instructions in the Drop-Off Instructions field at the bottom of the DROP-OFF section.
- Train: Click this tab to specify a departing train at a train station for the DROP-OFF section. Each train segment in the PNR appears as a separate row. Click the row to select the train segment. The departure and destination station codes and departure time and date are pre-populated. You can add drop-off instructions in the Drop-Off Instructions field at the bottom of the DROP-OFF section.
- Other: Click this tab to enter a drop-off address manually.
Selecting the Vehicle and Provider
Click the Service Provider tab to select a vehicle and a service provider. Contracted and preferred vendors and their account codes are preloaded specifically for your account.
To select the vehicle and provider, follow these steps:
- The vehicle class defaults to SEDAN. To change the vehicle class, choose a class from the Vehicle Class dropdown menu.
- Select the provider using one of the following methods, depending on whether or not you are using Rate Shop:
- If you are not using Rate Shop, choose your service provider from the Service Provider dropdown menu:

- If you are using Rate Shop, follow these steps:
- Click the Search For Providers button that appears:

A list of service providers and corresponding rates appears, sorted in rate order: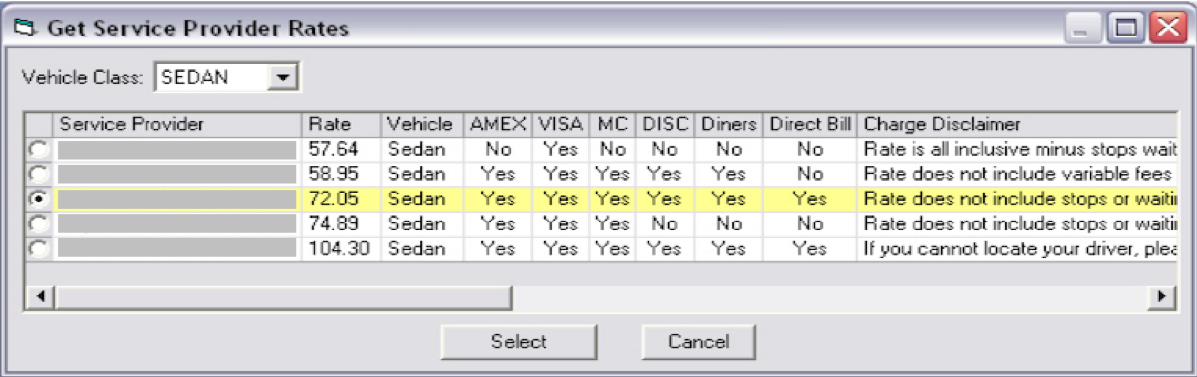
- Choose the service provider by clicking the radio button next to the provider name.
- Click the Select button.
After making your service provider selection, the provider name, code, and account number (if applicable) appear under the Service Provider tab.
Note: If you are booking an Hourly/Wait and Return reservation, the "Estimated hours" field is pre-populated with the hours you already selected (see "Booking an Hourly Wait and Return Reservation"). You can change the hours if necessary.
Setting the Form of Payment and Passenger Information
Click the FOP tab to view and modify the form of payment information: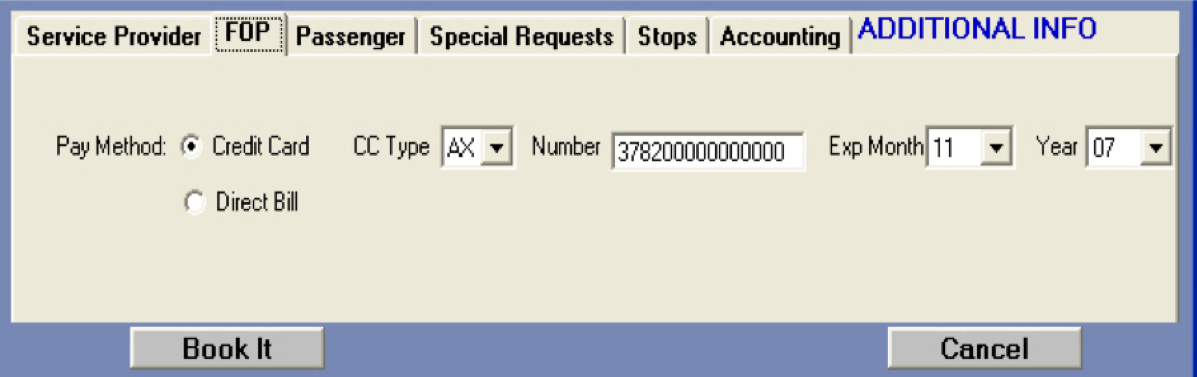
Note: Be sure to verify that the expiration date of a payment card is valid through the return trip leg.
Click the Passenger tab to view or modify the passenger information. You can modify the information or enter Information that is not already pre-popluated from the PNR.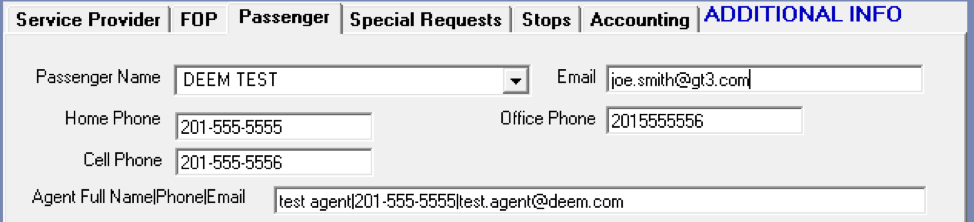
Note: Most service providers require a valid passenger contact phone number and email address.
Entering Special Requests and Stops
Click the Special Requests tab to enter the following information:
- Driver request
- VIP status
- Enable adding notes to the itinerary
- Add free-form requests to the service provider
Note: Pickup and drop-off instructions are already available for adding address-specific instructions – see "Setting the Pickup Location" and "Setting the Drop-off Location".
You can add up to 5 stops. Click the Stops tab to add stops: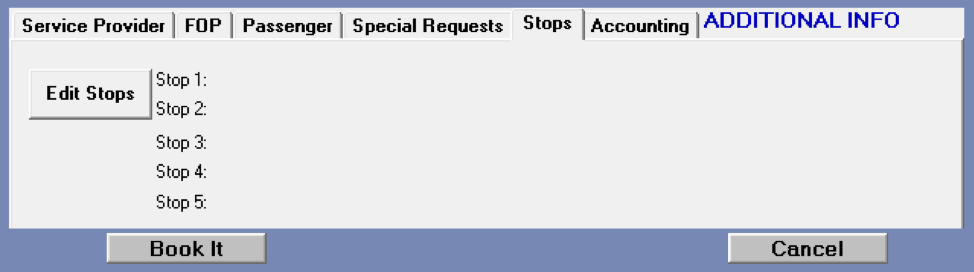
Viewing and Modifying Accounting Information
Click the Accounting tab to view and modify client-specific reporting fields: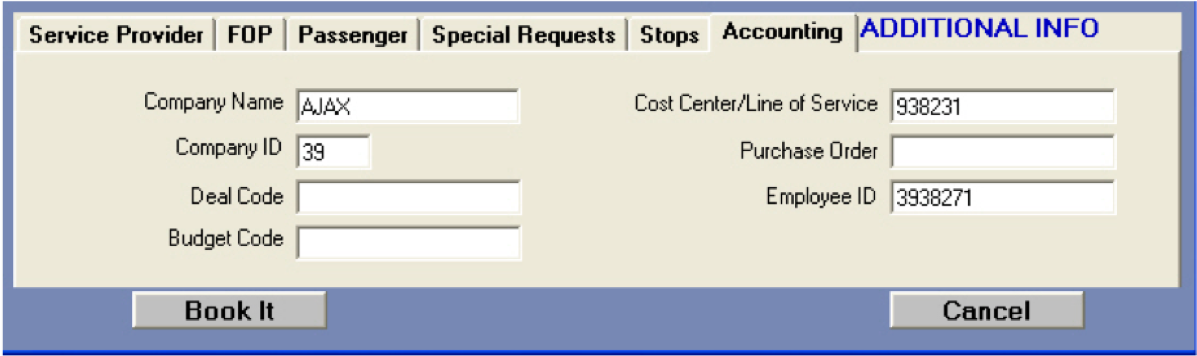
Note: The Company ID is assigned and can't be modified.
Locating Passenger Email
APOLLO passenger email is found by clicking on the Passenger Tab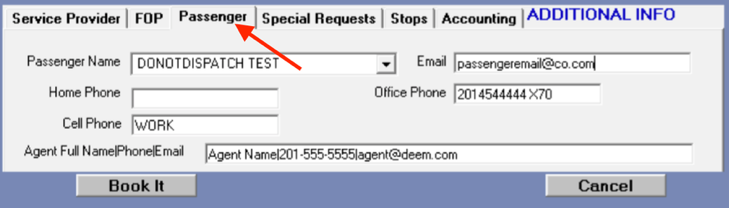
Verifying and Finishing the Booking
If there are no changes, click the BOOK IT button in the lower left corner of the New Reservation window to generate the booking.
You can then change the segment number for inserting the new itinerary, or use the pre-populated segment number, and click Insert. 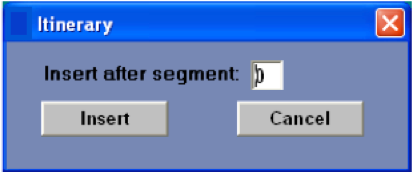
This creates a new pending NN segment, along with the full reservation request details in remarks.
Confirming the Booking
After clicking Insert (as described in the previous section), a new pending NN segment is created, along with the full reservation request details in remarks, such as:
1 LIM SI NN1 EWR 21NOV-/SATURN RESERVATIONS/PICKUP-RESIDENCE AT 1022A/DROP-OFF-AIRPORT/RESERVATION L1
Once the NN segment has been entered, receive and end the PNR. Then enter IR for the PNR to receive confirmation.
Upon confirmation, segments change from PN to HK:
1 LIM SI HK1 EWR 21NOV-/DYNASTY LIMOUSINE-TEL 800-555-1234/RATE-$50.00/CONF-S1772/PICKUP-RESIDENCE-300 PROSPECT AVE HACKENSACK AT 1022A/DROPOFF-EWR AIRPORT/865105271/RESERVATION L1
The above is interpreted as follows:
Warning: Never delete or modify Deem Car Service *PRSL remarks.
The following are examples of *PRSL remarks:
You may receive an "unable to confirm" (UC) message from the service provider. Common reasons include:
- The trip does not make sense (for example, DFW to Newark, NJ).
- The service provider declined the trip (for example, if the provider is sold out).
- The requested pickup location does not exist.
- The vehicle class was the wrong choice for the number of passengers.
Note: Enter *PO to read the UC error message from the service provider and check for rejected and declined messages.
Warning: Do not cancel or modify pending reservations. Always wait for the HK response.
Changing Reservations
To change an existing reservation, click the Modify Reservation button in the main window.
You can then:
- Change the pickup time. See "Calculating or Setting the Pickup Time".
- Change the pickup or drop-off locations. See "Setting the Pickup Location" and "Setting the Drop-off Location".
- Change the vehicle class and service provider. See "Selecting the Vehicle and Provider".
- Change form of payment and the passenger information. See "Setting the Form of Payment and Passenger Information".
- Change the special request or stops. See "Entering Special Requests and Stops".
- Change the accounting information. See "Viewing and Modifying Accounting Information".
Warnings:
- Do not cancel or modify pending reservations. Always wait for the HK response.
- Do not directly modify the date and time for airport pickups or drop-offs. Use the script to make changes. See "Setting the Pickup Location" and "Setting the Drop-off Location".
- Do not modify a reservation manually; always use the script. (Never XI, X1 or .HK).
- When modifying a reservation, use the script for changes. Check your *PO field for confirmation numbers, and to see if you receive "unable to confirm" (UC) messages for rejected and declined messages. If necessary, contact the service provider to ensure it has a notice of your changes.
- When making a change to a trip with a pickup or drop-off location at an airport or train station, you must change the flight or train information. Simply changing the pickup time without changing the flight or train information will result in a service failure.
PNR Notes
X1 or XI entries should never be used by agents who have access to the Deem Car Service script. Always use the script when changing or canceling car service reservations. The only instance in which the XI or X1 entries can be used is when an agent does not have access to the script. Using the script properly maintains housekeeping in the PNR and prevents potential corruption of data for subsequent requests.
Warning: Do not clone segments. Deem does not accept responsibility for any customer service issues resulting from cloned segments.
Handling Direct Changes with the Service Provider
If an agent or passenger changes a ride directly with the service provider, the agent should document the PNR and update itinerary remarks to reflect the change, but must not alter the car service segment in the itinerary.
Warning: If a .XK entry is used, any subsequent request for car service in that PNR may be corrupted and result in a service failure.
Canceling Reservations
Click the Cancel Reservation button in the main window to cancel an existing reservation. A confirmation window appears. Click OK to confirm the action.
Warnings:
- Do not cancel or modify pending reservations. Always wait for the HK response.
- As with a hotel or car rental booking, any changes made directly with the service provider without using Deem Car Service can "de-synch" the PNR, resulting in unwanted cancellations.
Note: Do not cancel a reservation manually; always use the script. (Never XI, X1 or .HK).
When canceling a reservation, use the script to cancel. Check your *PO field for cancellation numbers, and to see if you receive "unable to confirm" (UC) messages for rejected and declined messages. If necessary, contact the service provider to ensure it has a notice of your cancellation.
Updating Agent Information
- Click the Help link from the script page and select the Change Agent Contact Info option
- Edit the information and click the Enter button to save
PNR Notes
X1 or XI entries should never be used by agents who have access to the Deem Car Service script. Always use the script when changing or canceling car service reservations. The only instance in which the XI or X1 entries can be used is when an agent does not have access to the script. Using the script properly maintains housekeeping in the PNR and prevents potential corruption of data for subsequent requests.
Warning: Do not clone segments. Deem does not accept responsibility for any customer service issues resulting from cloned segments.
Handling Direct Cancellations with the Service Provider
If an agent or passenger cancels a ride directly with the service provider, the agent should run the script to remove the segment from the PNR. Use the script as you would for a normal cancellation, as described above in this section.
Warning: The CSS (.HK or .XK) should never be used when removing segments from the PNR that have been canceled directly with the provider. If a .XK entry is used, any subsequent request for car service in that PNR may be corrupted and result in a service failure.