Configuring Profile Synchronization with Enterprise Travel Systems (ETSI)
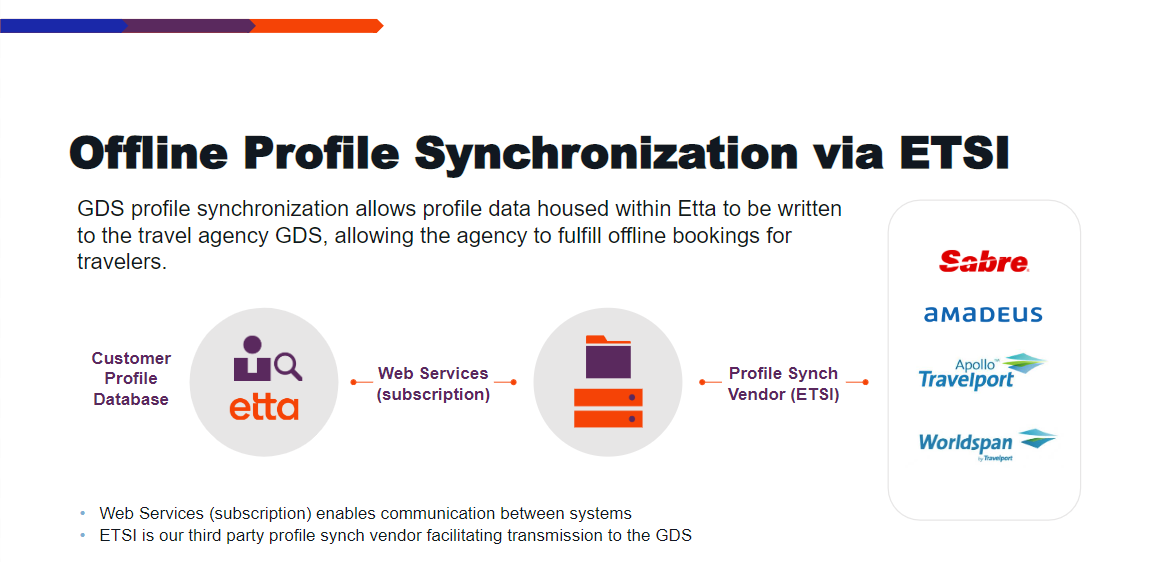
Enterprise Travel Systems, Inc., (ETSI) is our profile synchronization interface partner. Profile synchronization enables a travel agency to fulfill offline travel bookings for a user by synchronizing the Deem profile data with the travel agency's global distribution system (GDS). Web services let you to configure how user profile data is pulled into the system and synchronized with other profile management systems.
FOR TRAINING VIDEO AND POWERPOINT, CLICK HERE.
Setting Up an Account and Mask
To set up profile sync, follow these steps:
- Go to the synchronization site set up by Enterprise Travel Systems (https://www.etravelsystems.com/DeemUI/)
- Enter your user ID and password, and click Log In. The first page appears with the following links at the top (Success Report is selected):
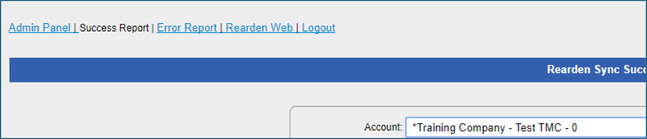
- Success Report: Provides real-time access to successfully synched profiles.
- Error Report: Provides real-time access to profile synchronization errors.
- Rearden Web: Processing profile synchronization maps.
- Logout
- Click the Rearden Web link. Account fields appear:
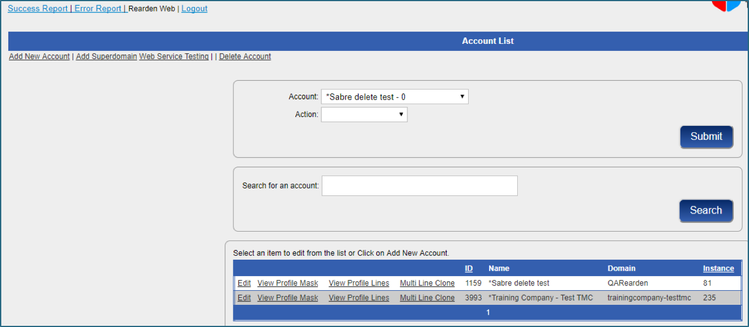
- Click the Add New Account link to create a new profile mask (map). The Add New Account screen appears:
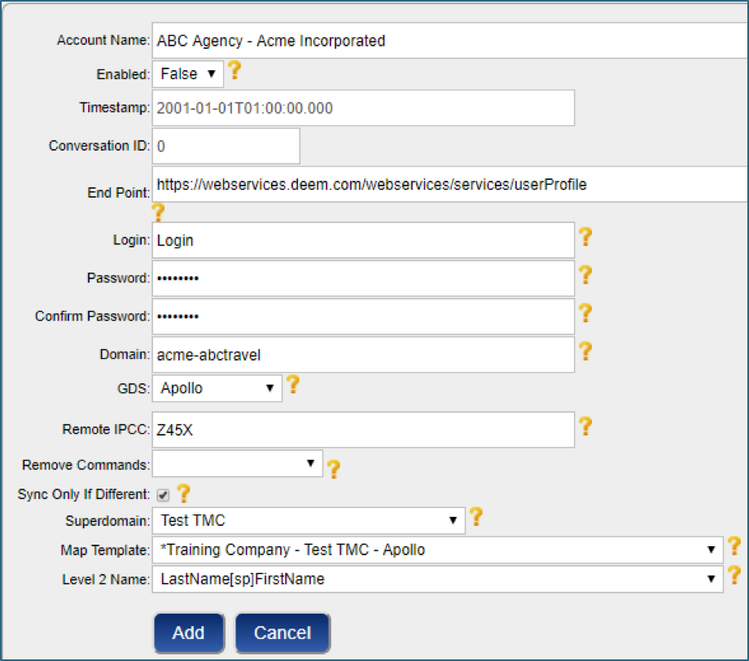
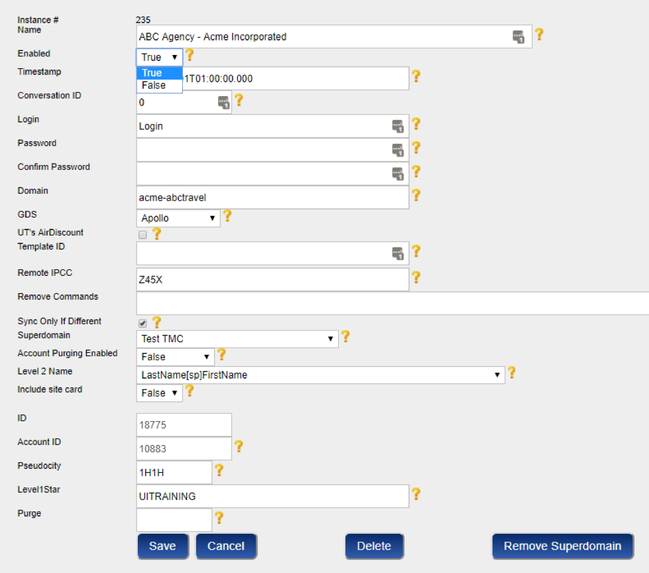
- Enter the following:
- Account Name: Enter the account name using the following format: Agency - Customer Name. For example: XYZ Travel – Acme Incorporated.
Note: If you use multiple maps for the same customer, include the group name (Agency – Customer Name – Group). - Enabled: Leave False for now. Choose True only after the configuration is complete to enable the account.
- End Point: This is populated with the web services URL. Do not change this value.
- Login/Password: Enter the value password in the password box and confirm password box fields.
- Domain: Enter the site short name (for example, acme-xyztravel).
- GDS: Choose the appropriate GDS from the dropdown menu.
- Remote iPCC: This should match the PCC on the Profile Mask page.
- Remove Commands: Choose your agency from the dropdown menu (for SABRE accounts only).
- Sync Only if Different: Click this checkbox if you want profiles to sync to the GDS only if data has changed since the last time the profile was synched to the GDS.
- Superdomain: Choose the super domain web service subscription assigned to the account from the dropdown menu.
- Map Template: Choose the appropriate map template from the dropdown menu.
- Level 2 Name: Choose the appropriate profile naming convention from the dropdown menu.
- Account Name: Enter the account name using the following format: Agency - Customer Name. For example: XYZ Travel – Acme Incorporated.
- Click Add to add the account.
After adding the account, you need to complete the mask and all necessary information
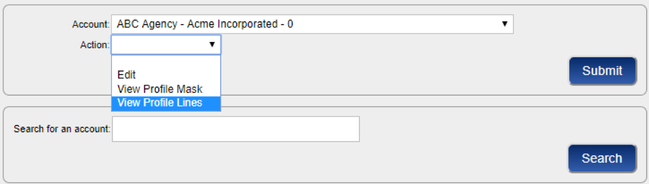
Select the account in the Account dropdown menu, and select Edit in the Action dropdown menu. The Edit page appears. Use The following links that appear at the bottom of the page:
- Edit: Lets you change the site name, GDS, profile naming, and other information.
- View Profile Mask: Lets you change the pseudo-city code (PCC) and first-level profile name.
- View Profile Lines: Lets you add, change, or remove profile lines.
- Multi Line Clone: Lets you clone multiple lines to an account.
Viewing an Existing Account
To view an account, select the account from the Account dropdown menu, and select View Profile Mask in the Action dropdown menu.

Editing an Existing Account
Follow these steps to update the PCC and first-level profile name:
- Retrieve the newly created account.
- Click the Edit link to update the PCC and 1st level profile name:

- Enter the information:
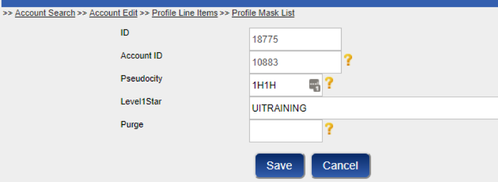
- Enter in the PCC into the Pseudocity field.
- Enter the 1st level profile name into the Level1Star field.
- Do not enter anything into the Purge field.
- Click the Save button to save your changes.
Editing a Profile Line
Once the account has been created and the PCC/1st level profile name fields are updated, you can update the customer-specific profile lines.
Note: If the map is an exact duplicate of the template map, this step is not necessary.
Follow these steps:
- Select the account from the Account dropdown menu, and select View Profile Lines in the Action dropdown menu. The lines appear.
- Click one of the following:
- Click the Edit link to edit the line description(Labeled Name Field), number, type (Always move, never move, etc.), secondary qualifier or modifiers.
- Click the Add Line Item link to add a line: Each profile line must have Line Items created. Line items drive components of the GDS format, as well as the XML data used to populate the profile line.
- Click the View Line Items to view a line.
Notes:- Data Type is used to drive GDS formats for Apollo and Galileo accounts. The Modifier is used to drive GDS formats for Sabre or Worldspan accounts.
- The profile line adds the line number, the line type, applicable secondary qualifier, data type (if applicable) and modifier.
- Profile line items must be created to add data to the profile line.
- Apollo maps must have a Data Type, which drives the GDS command (not the Modifier). Data types appear in the dropdown menu when applicable.
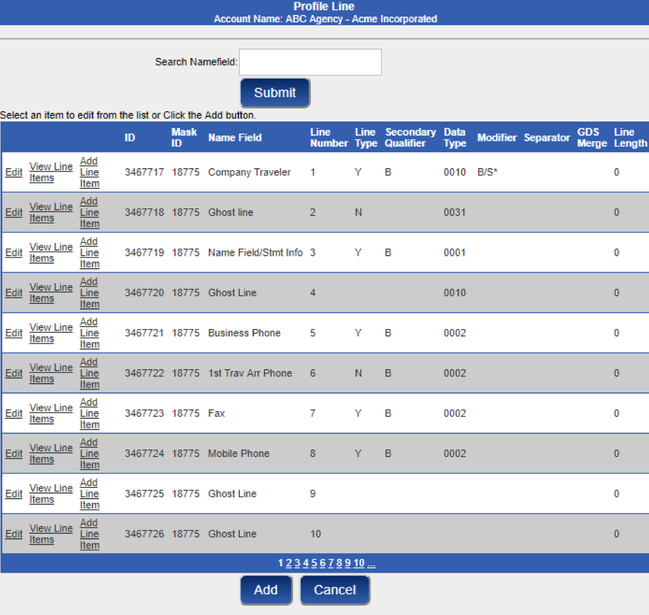
- Click the Add button if you want to add a new line
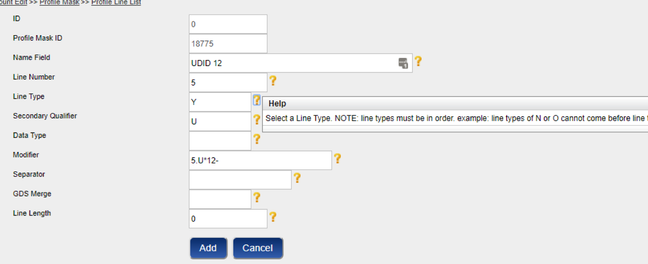
- Click the Add a Profile Line link to add a new line to the profile:
Notes:- Sequence: Used to determine the order of XML data in the line.
- Path: Should contain the XML path for the desired data.
- Prefix: Any hard-coded value preceding data. Often used with writing statement information.
- Suffix: Any hard-coded value following data. Often used with Worldspan accounts, applying # at the end of the line.
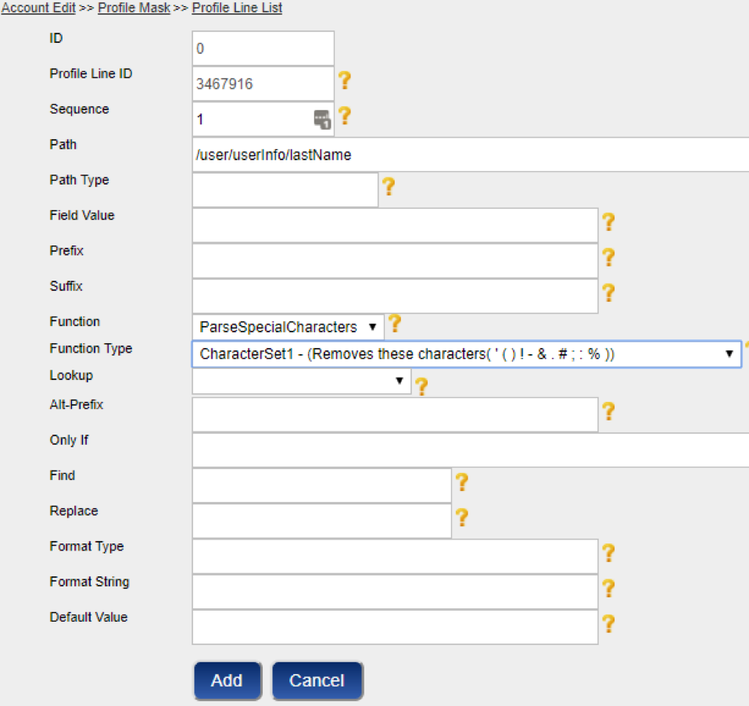
- Function: Contains any special actions associated with the line. Every function must have a corresponding Function Type.
Using Custom Fields to Write Data to the GDS
Using custom fields in the path requires the custom field collection and custom field name.
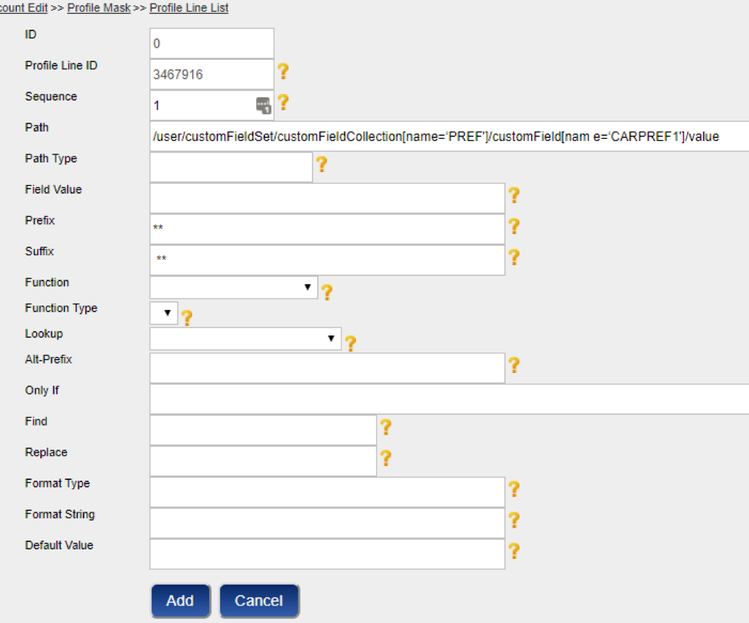
A custom field of PREF.CARPREF1 would appear as:
/user/customFieldSet/customFieldCollection[name=‘PREF']/customField[name=‘CARPREF1']/value
Using Functions to Write Data to the GDS
Functions allow you to apply custom coding to each profile line item. These include:
- Removing special characters
- Specify an explicit date format
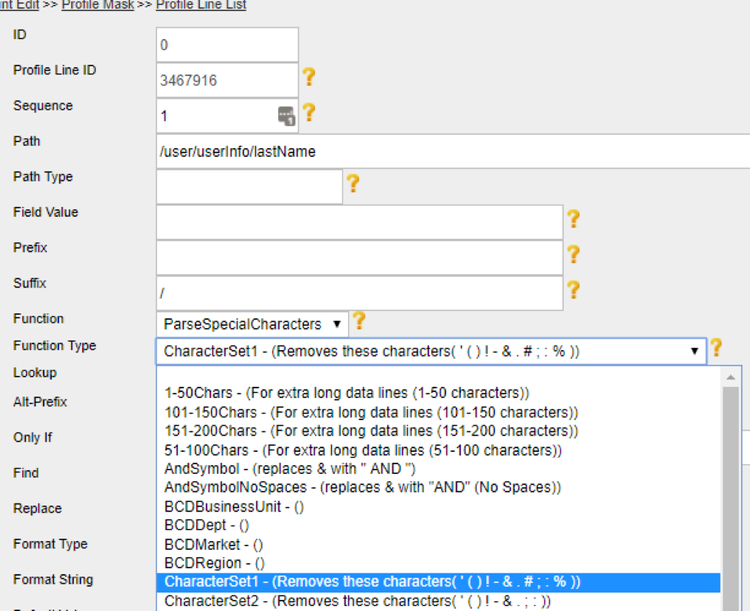
Select the Function from the dropdown menu, and then choose the corresponding type from the Function Type dropdown menu.
Using Lookups to Write Data to the GDS
Lookups allow you to perform value substitutions.
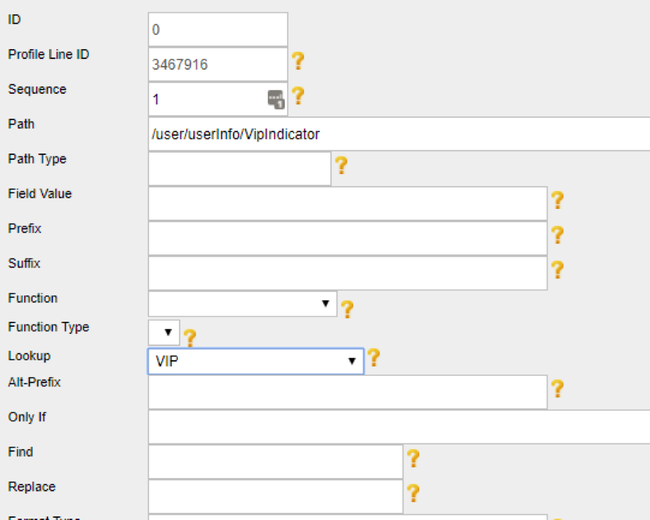
For example:
If VIP = “True”, then write “*** VIP ***”
Choose the Lookup value from the dropdown menu.
Using Only If Statements to Write Data to the GDS
Only If statements are used to add conditionals to the profile line item.
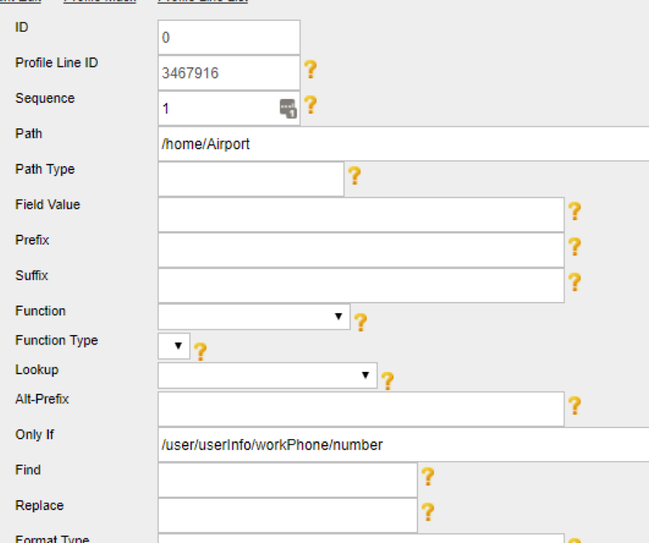
For example, you can only write a profile line item for a home airport if there is a value in phone field: put /user/userInfo/workPhone/number into the Only If field.
Enabling the Account
Once the mask has been completed and all necessary information has been updated, return to the Edit page and enable the account by choosing True for the Enabled option.
- Return to the Edit page and check the Enabled field from False to True.
- Click Save to save your changes.