Customizing the Passenger Name Record
- IT Info
- Kavita Pillai
- Becca Cook (Unlicensed)
You can customize the passenger name record (PNR) string to complete a GDS reservation. The PNR can be customized to contain basic information, such as adding a cost center to a name field, or to control processes, such as ticket exchanges. You must be familiar with PNR scripting for the global distribution system (GDS) you are using.
Note: In general, Deem creates custom PNR strings during the site implementation process. To determine which PNR edit strings are needed, Deem studies a typical agency booking and attempts to duplicate standard entries. This could include UDIDs, specialized cost savings documentation, and variable credit cards options based on departmental requirements. Deem is available to assist in any needed changes – enter a support case for assistance (see Entering a Support Case).
To add or edit a custom PNR configuration, follow these steps:
- After clicking the Services tab click the Travel Agency link. The Services | Agency Configuration page appears.
- Click the Custom PNR link. The Custom PNR Configuration page appears.
- Click the set name link for custom PNR configuration to be modified, or click the Add A New PNR Configuration link to add a new configuration. The Edit PNR Configuration or Add PNR Configuration page appears:
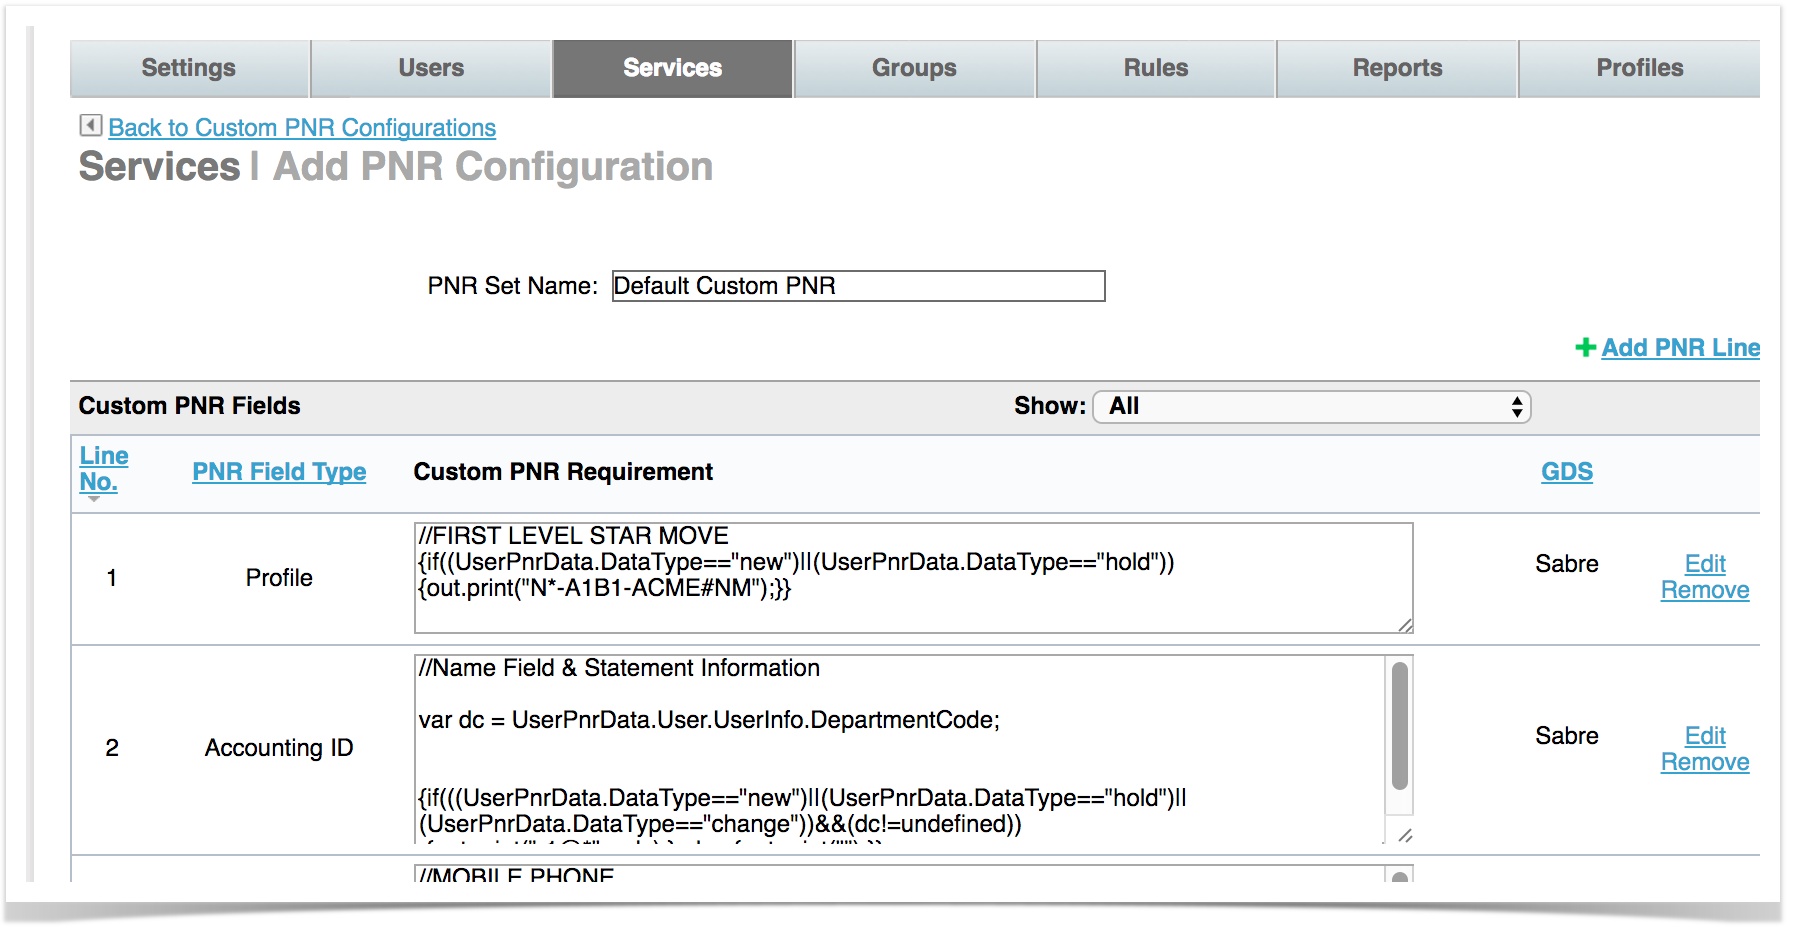
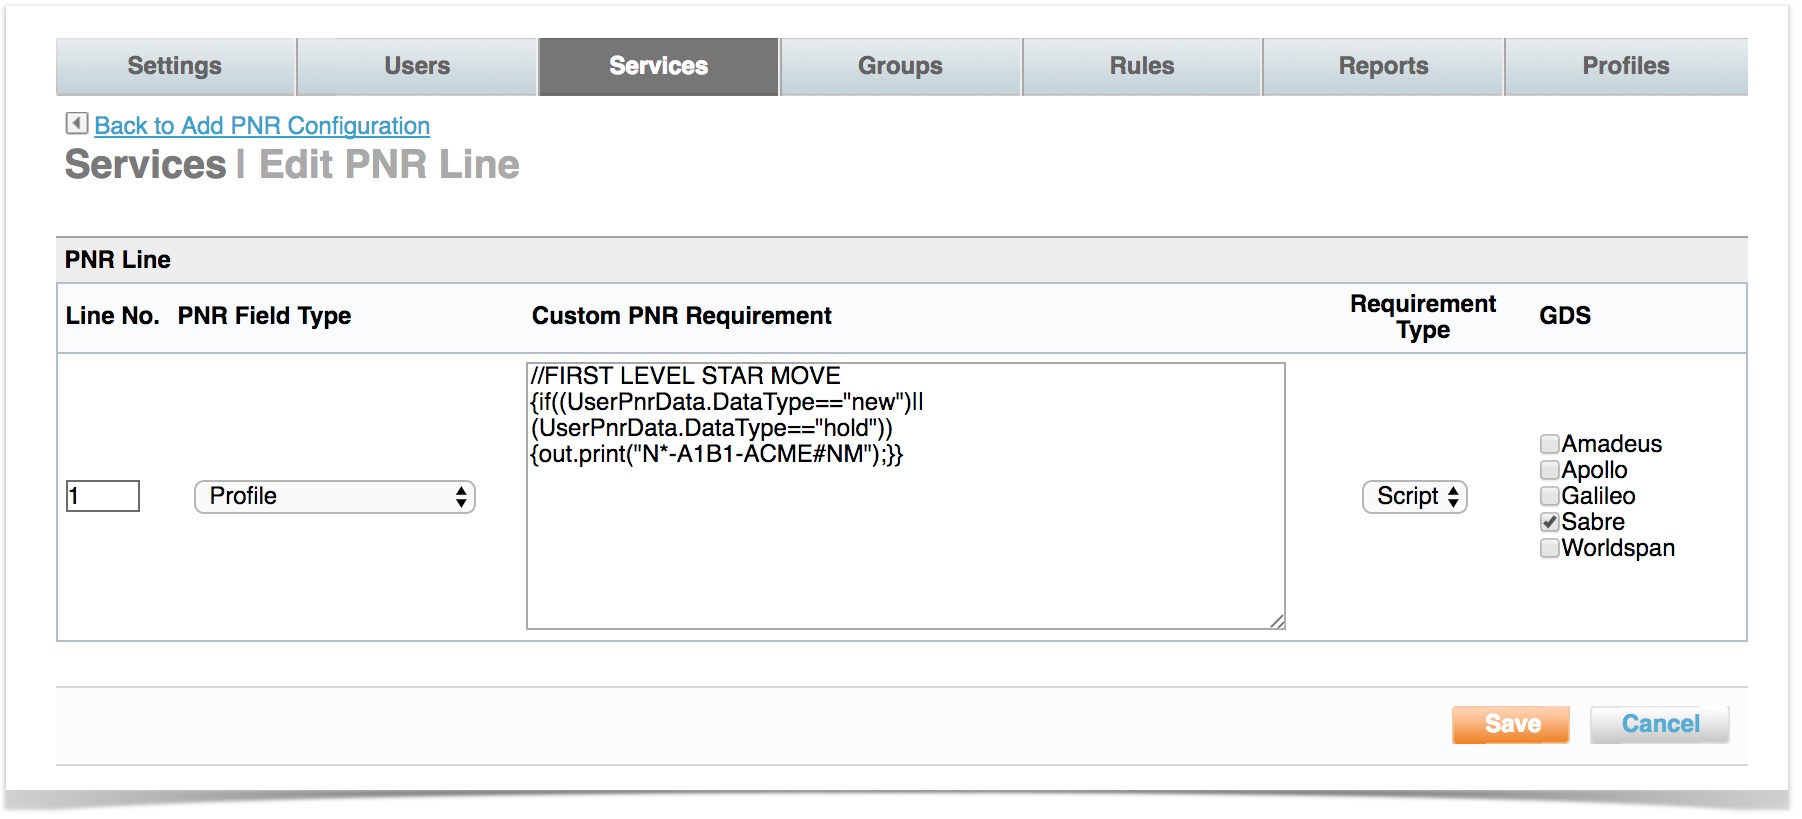
To edit an existing PNR line, click Edit in the far right column of the PNR line to modify the script in the Custom PNR Requirement field. The Edit PNR Line page appears.
To add a new PNR line to an existing configuration or a new configuration, click Add PNR Line. The Add PNR Line page appears.
Follow these steps after clicking Edit or Add PNR Line:
- Enter or edit the line number in the Line No. field.
- Select the PNR Field Type from the dropdown menu. For example, choose Special Remarks for special remarks in the PNR, or Agency Phone for the travel agency phone in the PNR.
Tip: For pre-trip approval configurations, choose Pre Trip Approval from the dropdown menu. - Enter the appropriate script or text in the Custom PNR Requirement box, and choose Script (JavaScript) or Text from the Requirement Type dropdown menu.
Tip: See Custom PNR Script Samples for sample scripts.
Note: For assistance with JavaScript for scripts, enter a support case (see Entering a Support Case) and request configuration assistance with PNR edits. - Click one or more checkboxes for the global distribution systems (GDS) you are using.
- Click Save button at the bottom of the page to save your changes.
Note: To commit all of your changes, click the changes not applied link at the top of the page. The Commit Changes page appears. Click the Commit button.